Last Updated: January 12, 2026
Are you considering custom concrete countertops for your Lawrence kitchen but unsure what the installation process actually involves? Unlike traditional countertop materials that arrive pre-finished and ready to drop in place, concrete installations require precision planning, careful transport, and skilled execution to achieve the seamless, durable surface you envision. Whether you’re drawn to the industrial aesthetic or the limitless customization options, understanding the concrete countertop installation process in Lawrence, KS, will help you prepare for a successful project that transforms your space.
From our experience working with homeowners throughout Douglas County, we’ve seen how proper installation makes the difference between countertops that last decades and those that develop cracks or uneven seams within months. The process involves multiple critical stages—from creating precise templates to ensuring level placement and proper sealing—each requiring expertise and attention to detail that separates professional results from disappointing DIY attempts.
Quick Answer: The Concrete Countertop Installation Process
Professional concrete countertop installation involves five key stages: creating custom templates for precise fit, casting precast sections off-site, transporting cured pieces to your home, positioning and leveling on cabinets using shims and silicone, and finishing seams with proper sealing techniques. The entire process typically takes 2-4 weeks from template to completion, with minimal disruption to your daily routine since most work happens in the fabrication shop.
Key Takeaways:
- Templating accuracy determines installation success—measure twice, install once
- Precast countertops are fabricated off-site, reducing mess and timeline
- Professional transport prevents damage to heavy, custom-cast pieces
- Silicone adhesive provides adequate hold while allowing for thermal movement
- Proper sealing protects against stains and moisture damage
- Installation typically requires 1-2 days on-site after fabrication completion
Understanding Precast Concrete Countertop Installation
The concrete countertop installation process in Lawrence, KS, begins long before installation day. Unlike granite or quartz that arrive as standard slabs, concrete countertops are custom-cast to your exact specifications, accounting for your kitchen’s unique dimensions, sink cutouts, and any decorative elements you desire. This customization offers unparalleled design flexibility but requires meticulous planning and execution.
Precast countertops—those cast in a fabrication shop rather than poured in place—have become the standard approach for residential installations. This method ensures optimal curing conditions, allows for quality control before installation, and minimizes disruption to your home. When our teams work in neighborhoods throughout Lawrence, including areas near Massachusetts Street and the KU campus in zip codes 66044 and 66046, we’ve found that homeowners appreciate how precast methods keep dust, noise, and mess out of their living spaces.
Why Precast Outperforms Cast-in-Place
Casting countertops in a controlled shop environment provides several critical advantages. Temperature and humidity can be carefully regulated, ensuring proper curing without the cracking that Kansas’s variable weather might cause. Fabricators can work upside-down on forms, creating perfectly smooth finished surfaces that require minimal sanding. Any air bubbles or imperfections can be addressed before the piece ever reaches your home.
Cast-in-place countertops, while still used for some applications, carry higher risk of professional concrete services complications. Controlling dust in an occupied home, achieving level pours on cabinets that may not be perfectly level themselves, and managing extended curing times while the kitchen remains unusable make this approach less practical for most residential projects.
Timeline Expectations for Lawrence Projects
From initial consultation to final installation, expect the full process to span 3-4 weeks. Templating takes 1-2 hours on-site. Fabrication requires 2-3 weeks for casting, curing, sealing, and quality checks. Installation itself typically happens in a single day for most residential kitchens, though complex layouts with multiple seams or integrated features may require additional time.
Due to Kansas’s freeze-thaw cycles, contractors familiar with the concrete countertop installation process in Lawrence, KS, always specify air-entrained concrete mixes. This regional adaptation—not typically known by national brands—prevents the microscopic cracking that can occur when moisture trapped in concrete expands during winter freezes, ensuring your investment remains structurally sound through decades of seasonal temperature swings.
Step-by-Step Installation Process
Understanding each stage of installation helps you prepare your home and set realistic expectations. Professional installers follow a systematic approach that prioritizes accuracy, safety, and longevity of the finished product.
Phase 1: Precision Templating
The installation process begins with creating accurate templates of your existing cabinets and layout. Installers measure every dimension, noting any variations in cabinet height, wall angles, or out-of-square corners. These measurements translate into forms that will hold the concrete during casting. Sink and cooktop locations are marked, along with any desired overhangs or decorative edge profiles.
According to industry standards, templates should account for appliance clearances, electrical outlet locations, and plumbing connections. Any errors at this stage compound throughout the process, making precision templating the foundation of successful installation. We recommend having plumbing professionals coordinate with Evergy and Kansas Gas Service to verify utility line locations before finalizing sink placements, especially in older Lawrence homes where original plans may not reflect subsequent modifications.
Phase 2: Fabrication and Curing
Back at the fabrication shop, forms are built according to template specifications. Concrete is mixed with precise ratios of cement, aggregates, water, and any colorants or decorative elements. The mix is poured into forms, vibrated to remove air bubbles, and troweled smooth. Reinforcing materials like rebar or fiber mesh provide structural integrity for large spans.
Curing takes at least 7-10 days before pieces can be safely moved, though full strength develops over 28 days. During this time, pieces are kept moist to prevent rapid drying that causes cracking. Once cured, countertops are removed from forms, edges are refined, and initial sealing coats are applied. Quality fabricators inspect every surface, repairing any blemishes before scheduling installation.
Phase 3: Transport to Your Home
Concrete countertops are extremely heavy—a typical kitchen island section can weigh 300-500 pounds. Professional transport requires padded trailers or specialized carts designed to protect edges and finished surfaces. Pieces are secured to prevent shifting during transit, then carefully wheeled into your home using equipment that distributes weight and protects flooring.
For multi-story homes or challenging access points, installation teams plan routes in advance, removing doors if necessary and protecting doorframes, walls, and stairways. This stage highlights why professional installation makes sense—attempting to maneuver hundreds of pounds of custom concrete without proper equipment risks both property damage and personal injury.
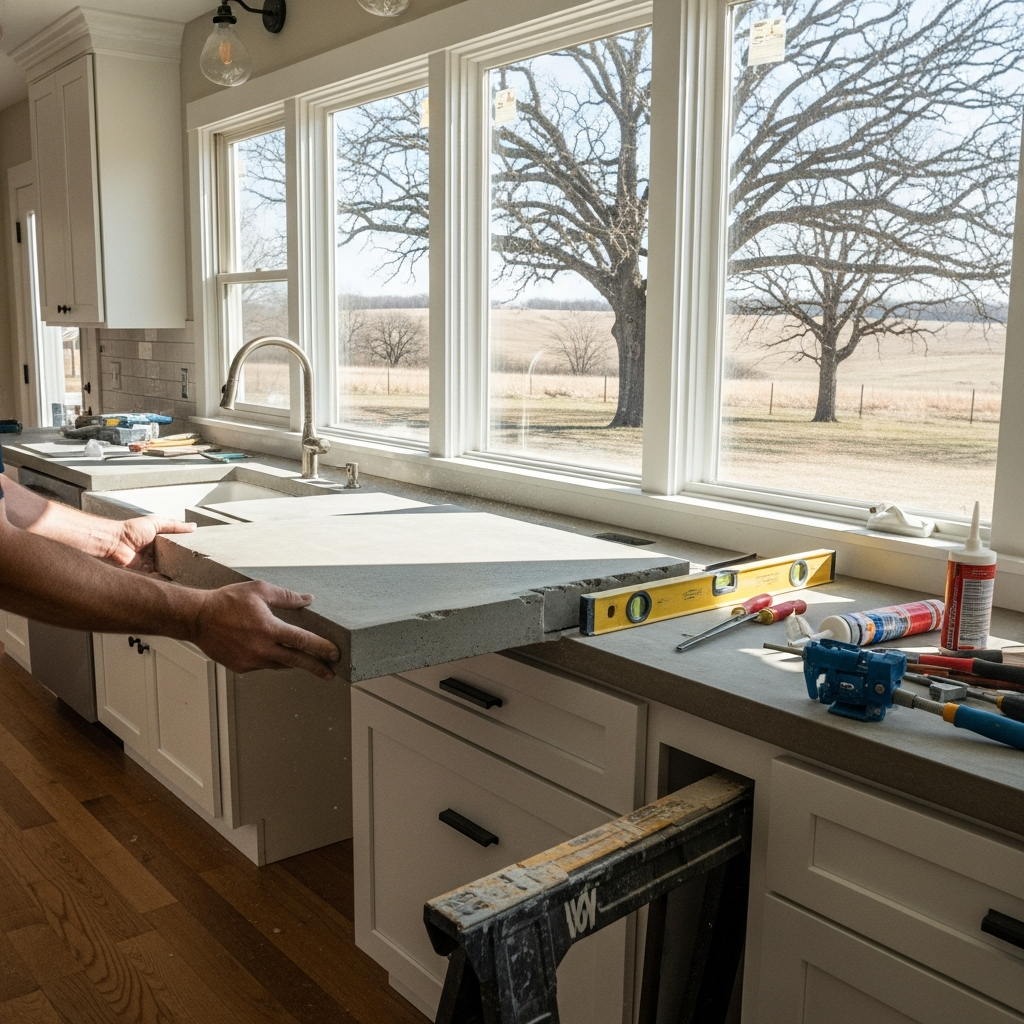
Phase 4: Positioning and Leveling
Once countertops reach your kitchen, precise placement begins. Installers remove cabinet drawers to access interior spaces for shimming. Using levels, they check cabinets from multiple angles—front to back, side to side, and diagonally. Small plastic or composite shims placed strategically under cabinets correct any variations, creating a perfectly level surface for the countertop.
With cabinets leveled, the countertop is carefully positioned. Clear 100% silicone is applied along the top front edge of cabinets—not aggressive adhesives like construction adhesive or Liquid Nails. Concrete specialists emphasize that silicone provides adequate hold for the countertop’s weight while allowing slight thermal movement and simplifying future removal if ever needed. The silicone also seals the gap between countertop and cabinets, preventing moisture infiltration and debris accumulation.
Phase 5: Seaming and Finishing
Most kitchens require multiple countertop sections joined at seams. Professional seaming creates nearly invisible connections. The process involves taping both sides of the seam, lightly scuffing edges with fine sandpaper to improve silicone adhesion, then applying a continuous bead of color-matched silicone. Installers smooth the bead with fingers or special tools, creating a flush joint, then carefully remove tape before the silicone skins over.
Final touches include connecting sinks and plumbing fixtures, touching up any minor edge imperfections with fine sanding blocks, and applying final protective sealer coats if specified. Farmhouse-style sinks, popular in Lawrence remodels, simplify under-mount installation compared to traditional drop-in models. For those interested in complementary polished concrete flooring, coordinating countertop and floor installations can create a cohesive design aesthetic throughout your kitchen and adjacent living spaces.
Common Installation Mistakes to Avoid
Even experienced contractors can encounter problems during concrete countertop installation. Understanding these common pitfalls helps you ask informed questions when vetting installers and recognize red flags during your project.
Inadequate Cabinet Preparation
Concrete’s weight demands structurally sound cabinets. Standard cabinets rated for laminate or tile may require reinforcement before supporting concrete. Installers should verify cabinet construction, adding support bracing if necessary. Failing to address this can result in sagging cabinets, cracked countertops, or even cabinet failure over time.
Similarly, cabinets must be level before countertop placement. Attempting to correct significant leveling issues after installation stresses the concrete, potentially causing cracks along seams or sink cutouts. When we work throughout the 66049 zip code and surrounding Lawrence neighborhoods, we always assess cabinet condition during initial consultations, recommending any necessary reinforcement before fabrication begins.
Improper Sealing and Maintenance
Concrete is naturally porous, making proper sealing essential for stain resistance and longevity. Some installers rush this step or use inadequate sealers. Food-grade penetrating sealers or epoxy topcoats provide necessary protection, but application technique matters. Surfaces must be completely clean and dry, coats applied evenly, and proper curing time allowed between applications.
Homeowners also need clear maintenance instructions. Concrete countertops require periodic resealing—typically annually for high-traffic kitchens. Using harsh cleaners or placing hot pots directly on unsealed surfaces damages the protective barrier. Quality installers provide written care instructions and specify recommended sealing schedules based on the specific products used during fabrication.
Rushing the Installation Process
Pressure to complete projects quickly sometimes leads to compromised quality. Installing countertops before concrete has fully cured risks cracking. Skipping thorough leveling to save time creates problems immediately. Rushing seam work produces visible, unprofessional joints. The cheapest contractor bid often reflects these shortcuts—saving hours during installation but costing you thousands in repairs or replacement down the line.
Alternative Installation Approaches
While traditional precast concrete remains popular, newer technologies offer alternative paths to achieving concrete aesthetics with modified installation processes.
Engineered Concrete Overlays
Companies like Granite Transformations now offer engineered countertop materials that replicate concrete’s appearance with enhanced performance characteristics. These products install as thin overlays on existing countertops, eliminating demolition and significantly reducing installation time—often completing in a single day. Engineered materials offer superior scratch, stain, and heat resistance compared to natural concrete while maintaining the industrial aesthetic many homeowners seek.
The overlay approach works particularly well for residential concrete projects where homeowners want updated aesthetics without extensive kitchen downtime. Installation involves minimal cabinet modification, making it ideal for rental properties or homes where owners plan to move within a few years.
GFRC (Glass Fiber Reinforced Concrete)
Glass fiber reinforced concrete represents an advanced countertop material that allows thinner profiles and lighter weight than traditional concrete. GFRC countertops can be just ¾” thick versus the 1.5″-2″ thickness of standard concrete, reducing weight by 40-50%. This makes transport and installation easier while maintaining structural integrity through fiber reinforcement rather than rebar.
Installation follows similar procedures to traditional precast, but the reduced weight simplifies handling. GFRC also allows more dramatic overhangs without support brackets, expanding design possibilities. However, GFRC requires specialized training to fabricate properly, limiting the number of local contractors who offer this option.
What to Expect on Installation Day
Knowing what happens during installation helps you prepare your home and coordinate with contractors for smooth execution.
Pre-Installation Preparation
Clear all items from existing countertops and surrounding areas. Remove small appliances, decorative items, and anything that could be damaged by dust or accidental contact. If replacing old countertops, demolition typically happens 1-2 days before new installation, allowing time to address any cabinet repairs or modifications discovered after removal.
Plan to shut off water to the kitchen. Disconnect plumbing fixtures if you’re handling this step yourself, or coordinate with your plumber to be present during installation. Ensure clear pathways from your front door to the kitchen, removing rugs, rearranging furniture, and protecting floors along the transport route.
During Installation
Professional crews typically arrive with 2-4 people for residential installations. They’ll bring countertop sections, transport equipment, leveling tools, silicone, and finishing supplies. Initial positioning and leveling takes 1-2 hours. Seaming and sink installation require another 1-2 hours. Final sealing and cleanup complete the process.
Expect some noise from power tools used for minor edge adjustments. Dust should be minimal since major fabrication work occurred off-site. Most installations complete within 4-6 hours for standard kitchens, though complex layouts or unexpected complications can extend this timeline. For those planning broader renovations incorporating custom concrete designs throughout multiple rooms, coordinating installation schedules prevents work from different trades conflicting.
Post-Installation Care
Avoid using your new countertops for at least 24 hours after installation to allow silicone to fully cure. Don’t place heavy objects or stress seams during this period. Your installer should provide specific care instructions, including recommended cleaning products, resealing schedules, and tips for preventing damage.
Initial color may lighten slightly over the first few weeks as residual moisture evaporates from the concrete. This is normal and doesn’t indicate problems. Some minor hairline cracks may develop as concrete continues curing—these are typically superficial and don’t compromise structural integrity, though installers should address any concerns during follow-up inspections.
Frequently Asked Questions
How much do concrete countertops cost in Lawrence, KS?
Expect to pay $75-$150 per square foot for custom precast concrete countertops, including materials, fabrication, and installation. Complex designs with integrated drainboards, decorative aggregates, or special edge profiles increase costs. Standard kitchen countertops (40-60 square feet) typically range from $3,000-$9,000 total. Engineered alternatives may cost $60-$100 per square foot with faster installation.
Can I install concrete countertops myself?
While DIY concrete countertops are technically possible, the process requires significant skill, specialized tools, and physical capability to handle heavy materials. Mistakes during templating, casting, or installation can be extremely costly to repair. Unless you have concrete experience and proper equipment, professional installation delivers better results and typically includes warranties protecting your investment.
How long do concrete countertops last?
Properly installed and maintained concrete countertops can last 30+ years or longer. Longevity depends on initial fabrication quality, correct installation techniques, appropriate sealing, and regular maintenance. Annual resealing and prompt attention to any cracks or damage preserve both appearance and functionality for decades.
Do concrete countertops crack easily?
Hairline cracks can develop as concrete naturally cures and responds to temperature changes. Proper reinforcement, air-entrained mixes for freeze-thaw resistance, and correct installation techniques minimize cracking. Most superficial cracks don’t affect structural integrity and can be filled during resealing. Significant cracking usually indicates installation errors or inadequate cabinet support.
What maintenance do concrete countertops require?
Clean with pH-neutral cleaners and avoid acidic substances like lemon juice or vinegar that can etch unsealed concrete. Wipe spills promptly to prevent staining. Reseal annually or bi-annually depending on use intensity and sealer type. Use cutting boards and trivets to protect surfaces. With proper care, concrete countertops develop a rich patina while maintaining functionality.
Conclusion
Understanding the concrete countertop installation process in Lawrence, KS, empowers you to make informed decisions about materials, contractors, and project timelines. From precision templating through careful transport and expert installation, each step contributes to creating durable, beautiful countertops that enhance your kitchen for decades.
Whether you choose traditional precast concrete, engineered overlays, or advanced GFRC options, working with experienced professionals ensures your investment delivers the performance and aesthetics you expect. By avoiding common installation mistakes and following proper maintenance protocols, your concrete countertops will remain a stunning focal point of your home throughout the years ahead.
For Lawrence homeowners ready to transform their kitchens with custom concrete countertops, contact qualified local installers who understand regional conditions, building requirements, and proven installation techniques that deliver exceptional results.
Sources and References
- Concrete countertop installation techniques and best practices
- Lawrence, KS residential construction standards and requirements
- Industry standards for concrete curing and sealing (Wikipedia)
- Local contractor experience and case studies from Douglas County installations
- Material specifications for freeze-thaw resistant concrete applications